Carb Synchronization

On
most multi cylinder 4 stroke bikes the carbs will eventually get ?out of
sync?. The
reasons for carbs to do this can vary but the results are the same. Less power,
bogging at
various rpms, and poor performance.
We
hope this tip on how to sync your own carbs helps. Keep in mind bad jetting or a
damaged or ?open? exhaust and electrical problems can cause these problems
too. You
should get professional advise on weather or not a carb sync will work for you.
I have
found a major difference in bikes I have synced.
First
you must acquire a gasoline test tank. This is a tank that can feed gas to your
carbs while your tank is off the bike. (note: a antifreeze overflow tank from a
water cooled
bike or car works nice. Most junk yards and bike shops have these on hand). Also
motion
pro makes one for 40-50.00 that has a petcock and fuel line.
Next
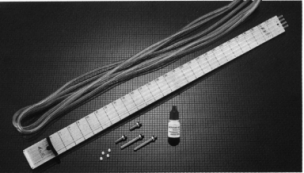
you must acquire a set of synchronizing gauges or sticks. The type I recommend
are the mercury filled type. They can be purchased for about 40.00.
Now,
there are two basic types of carbs. The two types are standard and CV (constant
velocity). Standard carbs will have a small cap on the top that must be removed
for you to
sync them. The CV carb ,usually on most all twins and most 4 cylinder bikes
after ?79, are
easier to sync due to the fact that the adjustments are external.
The
concept of syncing the carbs is to make the carb work at its most efficient
level
with the vacuum available to it. One off sync carb can drag down the rest of the
cylinders
on power. So what you are going to do is hook up a device (the carb
synchronizer) to
each of your carbs vacuum tubes and adjust the carbs until they are all working
on the
same vacuum level.
So here are the steps.
1- Take off the tank to expose the carbs.
2- Hook up test tank. DO NOT FILL YET.
3-
Find the carb or
manifold vacuum hook ups. These are different from bike to bike.
Some are on the intake boot (on the head) and are actually tubes with vacuum
caps that
you can remove. Others are a Phillips screw that can be removed from the head or
front of
carb to install the tubes that come with most sync gauges. And still others have
the
vacuum hook ups on the top of the carb. Most manuals will show this location.
4-
Hook up your
synchronizer to the bike by installing one hose per cylinder and set the
gauges on a stable surface or hung safely.
5-If
you have a older bike with standard carbs remove the small caps at the top of
each
carb. (if the cap is larger than 2? x 2? you may have CV carbs and this is
not necessary).
This will expose the carb throat adjustment.
5b-
If you have CV
carbs, look between each of the carbs for a screw with a spring under
it. These are the butterfly adjustments. Most 4 cylinder bike have only 3. One
of the
middle carbs is non adjustable. This is the carb used as a gauge for the rest of
your carbs.
You will be adjusting the other carbs to match this carb in vacuum level. Also
make sure
you have the proper tools to get to all the adjustments.
6-
Next you need to
find the screws to adjust the mixture. They are also on various
locations and are sometimes covered with a aluminum plug to hide them. Make sure
you
have the tools to move the screw for the mixture.
7- Fill the test tank with good fuel.
8-
Start the bike (DO
NOT REV UP). You may even want to warm the bike up before you
start if you feel revving is necessary. You will need to set the idle at appr
1/4 to 1/3 of the
rpm needed to reach the maximum torque level. Examples
KZ900/1000 max rpm for torque 8500rpm appr 2000-2500rpm
FZR1000 ?87 max rpm for torque 10500rpm appr 3500 rpm
CB750K ?75 max rpm for torque 7500rpm appr 2000 rpm
this
may not be consistent with some directions for this procedure. I base this on
personal
experience only.
9-
While the bike is
running at the appropriate rpm adjust all the carbs to match the one of
the center carbs that is not adjustable li
10- After step 9 bring the rpm back down to idle.
11-
Adjust all the
mixture screws to their highest idle. This will be a very small difference
in rpm but if you listen hard you will hear it.
12- Now re-adjust the main idle to the normal level for your bike.
Now
you should have a synchronized set of carbs that will make your bike more
powerful
and smoother than before. If you have any questions about this procedure or
where to find
the adjusters on your bike Feel free to call or e-mail me. SAFE HAPPY RIDING
Additional Information
Here is a link to a site about how to make the tool for YICS Yamaha's.
http://home.westman.wave.ca/~jbe/YICS.htm (non functional link to save confusion. You will need to cut and past to your browser to use) (You will want to use the link below to see the instructions in such a way that allows return to our site)
This is NOT our material. It was copied from the link above. The actual tool is no longer available from Yamaha. This link could save you time and $ The link was supplied by someone that wanted to help.